How to edit sky in photo
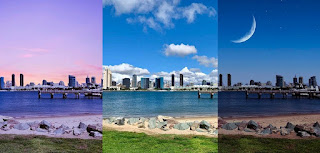
We all take a picture or two at some point, maybe at an event, with friends, with family, etc. Imagine for a moment that we are taking a picture with our whole family, everything looks perfect except for the sky. How can we modify the sky in an image? It turns out to be much simpler than you can imagine.
How to edit the sky in an image in Photoshop
In this tutorial, we are going to use one of the best photo editing tools: Photoshop. Thanks to this interesting program, we will be able to make really impressive adjustments in many aspects.
release
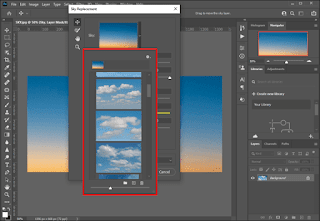
We start by starting the program and opening the image of the sky that we want to edit. Once opened, we will have to go to the upper left part of the program and click Edit.
sky replacement
Here we will choose "Sky Replacement". A dialog box containing various presets should open.
We choose the filter to modify the sky of the image
We'll scroll through the list of presets and can choose what we want.
In this way, we can modify or modify the sky of the photo, it will become a kind of Instagram filter; Although we can also adjust the colors using the sliders at the bottom of the image to give it a better look.
In case we need clear sky images with the best possible definition; We can go to the Adobe Discover website where we can find a large number of suggestions.
With Lightroom
Brush for editing sky photo
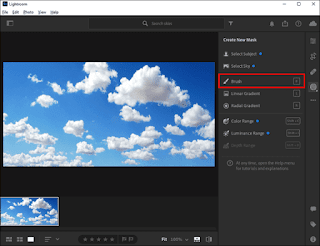
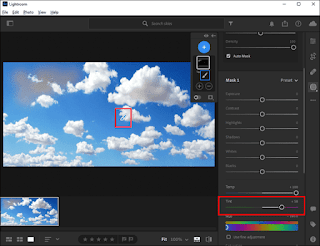
We will start by opening the program and importing the image we want to edit. Next, we will have to choose the Brush tool located in the upper right corner of the sidebar. This tool will help us to map the sky to the image so that we can easily modify it.
Auto mask
It is important that we check the box next to "Auto Mask" that we will find at the bottom of the Brush panel. This will limit the brush to the sky and we were able to prevent it from being set, adjusting the color of objects, etc.
Adjust
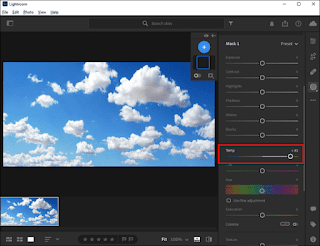
Next, we move the "Temp" slider to the left or right to be able to set the blue tint we want to apply to the image. If we move it to the left, the level of blue increases.
We proceed to editing the sky of the image
We will have to use the brush to introduce the blue pigment, but it is necessary to make sure that the center of the brush does not touch anything under the sky.
This way we will be able to modify the sky of the image, in this case using Lightroom in a simple and fast way. Although we must realize that, unlike Photoshop, in this case it requires more patience.
Share it with your friends!

