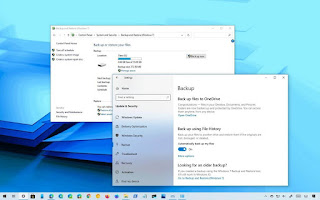
How to enable automatic backup in Windows 10?
Enabling automatic backup in Windows 10 is an interesting idea so that you are not familiar with Ghost, and do not risk problems with restore points of this operating system
Activating automatic backup in Windows 10 takes no more than 2 seconds, which is one of those functions that Microsoft offers us that are really worth taking advantage of on our PCs
Typically, to back up the operating system, computer users often use the build version of a Ghost solution to "bounce" the current state of Windows and use it for recovery when there is a problem. Hence, they have forgotten that knowing the steps to follow to enable automatic backup in Windows 10 is another one of the best ways to protect your files.
The differences between the two procedures, in case of any discomfort, are not many or significant. We can say, in fact, that they have to deal with the time it takes to cover our backs in this way. Even a Ghost solution can corrupt disk partitions if we don't pay attention.
To avoid these accidents precisely, the people at Microsoft have developed a series of functions related to backup and restore, called in this way, that allow you to quickly back up data, as well as the state of the system.At a certain time and use it later.
In general, this feature works somewhat better than a system restore point because you can be proactive in choosing storage partitions, as well as control the ability to perform backups automatically. If you're interested in taking advantage of this trip, here are some suggestions.
Enable automatic backup in Windows 10 step by step
Enabling automatic backup in Windows 10 is very easy, especially if you follow these steps:
Type Control in Cortana, and click on the Control Panel result
Click the Backup and Restore option, under System and Security
Go to the Backup Configuration section, and wait for this function to start
When starting, a window will appear for setting parameters such as disk partitions
Click on the section that interests you to store future backups there
Then select the type of data you want to save, the time when it should be done, and advise you to select the time when you do not use the computer normally.
Once everything is OK, click Save Settings and Run Backup
From then on, whenever you want, you can check out more information from the See process details section.
If you need to restore later, just go to Backup & Restore and Restore My Files
In conclusion, enabling automatic backup in Windows 10 is not only one of the recommended tasks for sleeping peacefully, but one of the actions to do before upgrading to Windows 11.


